
Paperclay Ornament Tutorial : Part 3
Today is our last day of sculpting on our Paperclay ornaments!!
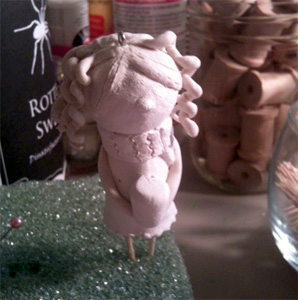
Here's where we left off yesterday. Now the scarves and skirt are dry and we will be adding on all the rest of the details today!

I first added some little arms to each girl and glued on the things that they are holding on to. (forgot to take a picture of this step, sorry!)
Next is the hair. Hair can be a challenge, but if you take it one step at a time (or in the case of hair, one strand at a time), then it isn't as hard as it seems.
Before doing the strands of hair, I made bangs. (of course, some people don't have bangs, or you may want to do the bangs with individual strands, which is fine too). But the way I did my bangs was just flattening some clay to the head and then cutting off the parts that I didn't want to be there. Then I added some lines in the bangs to give it some texture.
After the bangs, I inserted my little eye-loop screws for hanging my ornaments (with pliers).. but like I mentioned before, you can always do this part on the first sculpting day & it might be easier for you. If you absolutely forgot to put the screw in and can't get it in after it's dried, you can always make it into a tabletop sculpture, so don't worry!
I wanted to do the curly haired girls first since I knew they would be more difficult.
I start by rolling a really skinny piece of clay (like you would to make a snake). Make it as skinny as you want your hair to be.
If you are doing a straight -haired girl then you can just cut the skinny snake into the lengths you want and attach them to the head. But if you want a curly-haired girl, you will need to curl the snakes. I curl them tightly at first so that each curl touches, then I pull the strand to give it a loose curl look like in the picture below.
It's easiest to do lots of strands of hair at once and then attach them to the head (i think).

I always start attaching them at the front of the face and then work around to the back.
Here's how the Alyssa ornament with curly hair, a dress, holding hot chocolate turned out!
Next is the straight haired one of me holding my cat Spanky.

And last is my mom with shorter curly hair holding a camera! Her hair is actually longer than this now, but i liked how it turned out so I left it shorter :)

And here's a group shot of the backs of all 3!

That's it for my sculptures. But if you have more things do add then just add them and let them dry overnight again.
Stay tuned for our next post when I will be showing you how I paint my sculptures! If you think you arn't good at painting, don't worry! We will be using acrylic paint which is great for beginners because it is inexpensive and it covers mistakes well :)
-------------------------------------------------------------------------------------------------
Want to see the rest of the tutorial? Click on the desired step below:
Part 1 | Part 2 | Part 3 | Part 4
-------------------------------------------------------------------------------------------------
Find out more about me and my work by visiting my website.
No comments:
Post a Comment